Everyone in my circle knows that I’m always on the lookout for DIY recycling materials, so when my brother-in-law (and father of my precious one-year-old niece) handed me a few of his unwanted button-up shirts, I knew immediately what I wanted to do with them. Why, I would transform them into toddler dresses for his daughter, of course! As expected, there were plenty of web resources to inspire me.
My favorite web finds
Since men’s shirts provide lots of material to work with, as well as a built-in button placket to incorporate into the finished product, the DIY possibilities are plentiful. If you’ve got a very large shirt on your hands and you’d like to make something for yourself, check out these cool projects on Clever Girl.org. The author has made loads of cute and inspired women’s clothes out of men’s shirts. But if you’ve got your heart set on making a toddler dress (as I was), then check out this “sunshine-in-a-dress” tutorial. This playful frock with elasticized neck opening and sleeves plus a contrasting fabric waistband was my absolute favorite find. I, though, opted for a much simpler design–a simple sleeveless A-line summer dress using ready-made bias tape for my straps.
What I made
Before:

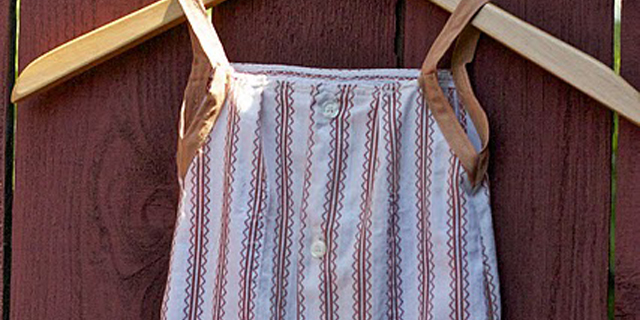
After:

Steps
Step 1: Cut out the front and back of the dress. You’ll have to either measure your little girl or use an existing dress to guide you as far as length and width. Carefully remove any pockets on the shirt with a seam ripper, then cut out two shapes (like the one pictured below) of equal size. Since you’ll be salvaging the button closures from the original shirt, you won’t have to worry about the dress being difficult to put on or take off.

Step 2: Finish the top edges. Before you attach the straps, you’ll need to finish the top edges of both the front and back pieces. If you’d like, you can also add a couple of pleats to the front of the dress, positioned at equal distances (about 2 inches or so) on either side of the button opening. Pleats will make the front piece a little narrower at the top than the back.
Step 3: Attach your straps. In this step, you’ll be finishing the armhole edges (for both front and back) plus attaching the straps all in one. You’ll need two equal lengths of bias tape — one for each shoulder. The length will depend on how long you’d like the straps to be. The photograph below should do most of the explaining, but here’s what you’ll do: pin the bias tape to the unfinished edge of the front piece. Then, where the bias tape meets the top edge of the dress, fold the tape underneath so that the strap protrudes from the top of the dress at a 90 degree angle. Pin at the fold to secure. Then, allow enough bias tape to create your strap (at your desired length) before pinning the tape to the raw armhole edge of the dress back. If any of this is confusing, the photo below should clear it up! Now, simply stitch the bias tape to the dress.

Step 4: Stitch the side seams. Attach the front to the back by stitching the side seams (right sides facing).

Step 5: Hem the bottom. Finish up the bottom hem, and you’ve got yourself a toddler dress!
Step 6 (optional): Make pockets. If your men’s shirt had pockets, you can trim them down and add them to your dress. Simply cut them to the desired shape, then iron the edges underneath (as you would an applique).

Pocket placement is entirely up to you. I attached mine applique style using a zigzag stitch.

Done! Now go surprise that special father-daughter duo in your life.